


 |
| Water colored |
In this tutorial I will share with you a method for burned
and layered holes. Since the actual
technique is pretty straight forward, I’m going to put my slant on what my
experiments taught me, and ideas for how to make your creations more dynamic.
First
things first – safety!!! It is obvious but – this involves a soldering
iron and it is HOT! Please don’t leave
it unattended while it’s turned on. Also
don’t let children or pets anywhere near it! I don’t want to be the cause of
any disaster (as much as I can help it).
Thanks,
the management
So to begin, lay out your work space. I always do this on a heat proof mat, with
some kind of metal tray to hold the iron. Don’t skip the tray. You have tedious work ahead and you’ll need
to put the thing down occasionally.
Optionally, I have a TV or computer screen in viewing distance. As I mentioned, this is kind of tedious work
and besides, it’s a good excuse to catch up on all those old Veronica Mars
episodes. J
The soldering iron I have is one I got at Michael’s with a coupon making it
slightly more than $10. It was meant for
crafters and came with multiple screw on heads.
Two of these could work for our purposes (see fig B). The pointier one is best since it gives you
an advantage for size of hole – we want variety in the hole department. If you are using a different kind of iron you
may only have the standard tip which will also work.
 |
| Heat-proof mat, tray, soldering iron |
 |
| Fig B |
 |
| Size Variety |
So now you have your table laid out and safety on your
mind, time to pick the paper. For this
demo I’ve used cut up maps. They don’t
need to be anything special. I just used
an old RoadMaster standard road atlas that was riding around in my car for
years (even after it became obsolete due to smart phones). This is a good weight paper for hole burning
(light weight, not shiny) and if you goof, which is pretty hard to do, you can
toss it and start over without worrying about the expense ($0). I also experimented with craft weight paper
which I’ll talk about later. I cut my
sheets to the size of my project first because, as mentioned, it’s boring to
burn holes and I don’t want to do any more than I have to. This is also where you need to think about
how many layers. Two or three with holes
and one base layer without holes is a minimum, I’d say. If you are a maniac (or fire bug) and love
burning holes, knock yourself out! More
layers will look way more cool.
 |
| Hold Paper Upright |
I tried two basic methods for making holes. The first was laying the paper on the
heat-proof mat and “drawing” the holes with the tip. This didn’t work so well for me. The second way was better. Holding the paper up off the mat and poking
it with the iron was pretty successful for multiple sized small holes. Holding
it up and “drawing” with just the pointy tip worked great for larger
holes. As I mentioned before, a good
variety of sizes makes a more interesting piece overall. I did most of the big holes first and then
peppered in the smaller ones between for a good effect. The composition of where the holes are and
how you can see through them to other layers is what will make your art
unique. I personally think lots of holes
on all layers makes for the most interesting completed project but it is all up
to you. Also, I found that some of my
holes didn’t burn cleanly through and left some paper ‘sludge’ around the edges
on the back of the sheet. A couple of
light swipes with a sanding block gets rid of those.
 |
| Contrast |
A word about the artistic aspect of the project –
CONTRAST. It is the contrast of your
layers that will make it interesting (isn’t that true of anything in
life?). I like to go from lighter at the
base layer then darker as you go up.
Again though, depends on your personal aesthetic. Don’t be afraid to
stack and re-stack the layers before you glue.
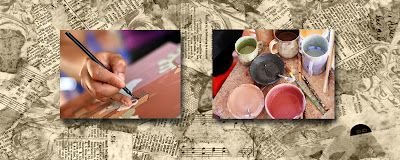
For this demo I just used Distress ink to add a bit of color to the
layers. I have also used watercolors (see photo collage at top) which works well too but then you have to let it dry and it can wrinkle and
warp the paper.
 |
| Stacked |
As for glue, I like to use Sookwang double sided tape
because it stays stuck and won’t wear out over time. Also, no drying time and won’t wrinkle the
paper. I’ve also used Diamond glue,
though mostly for touch-ups. Also, for
this I don’t want every bit of paper glued down. I want to leave the layers free to create
shadow and give more of a sense of depth.
 |
| Tape Loosely |
So I mentioned that I tried craft weight paper. It is thicker (this was double sided) and not
as easy to burn the holes through. It
did look kind of cool though. Also,
since it was thicker, I could burn shapes other than rounded holes (sort of).
 |
| Shapes of Holes with Heavy Paper |
So that’s it!
Easy and sort of relaxing in a pyromaniac sort of way (especially with
Veronica solving crimes while you work).
One last word on the topic – FINISHING.
By that I mean clean up the edges, clip corners and ink around the
edges. Those are good ways to complete any
project and I always do. Not required
but I think you’ll find it will lift your work to a new level with those easy
additions. I also usually spray the finished piece with clear acrylic sealer to
keep the colors crisp.
 |
| Finished Edges |
Thanks for sticking with me all the way through! I hope this is the first step toward some
cool new projects in your craft room!
Heather
17 comments:
I was asked where I got the idea for this. As I was perusing the web one day I came across the artist Karen Margolis. Please go check out her Maps with Holes at http://www.karenmargolisart.com/maps-1/. She does beautiful work!
Thank you for explaining how you made those interesting holes. Definitely something I would like to try. I really like the varying colorful layers. Thanks gabriele
Thanks for sharing,Heather.This is really cool,and now I think I need a soldering iron, lol.
I was lucky enough to receive one of these index cards. It looks even better in person. Thank you for sharing the technique. Off to find the soldering iron....
Barb A
Thanks SO much...the results are amazing!
Very interesting! I am sure I will find a way to use this technique in some of my abstracts! Thanks for sharing!
Really want to try this. Would a pyrography wood burner tool work?
What about making stencils this way?
Thanks for simplifying this Art. Great tutorial. Will definitely have a go.xxxx
Genial y muchas gracias Por su información
I have wanted to learn how to do this since I first saw the technique. Thanks for sharing your talent with us. I have to try this, yours are lovely. I have lots of old maps to burn.
I wonder if it would work on fabric...
Dang, this is so beautiful. Thanks for the thorough instructions! I'm gonna make this a project with my teens
Miss Karen's circle work is fabulous! The link does not take you to a page, tho, but check out her site!
Absolutely! Anything that gets super hot like a wood burning tool, soldering iron, silk flower tools, etc.
Absolutely! A great idea and yes, would work perfectly!
From your post to my ears! I sew and I think this would work great, as I singe (burn) petals for flowers but just be very very careful!
Post a Comment