 |
| Download Hi-Res version HERE: https://1drv.ms/i/s!ApNPaUGF98dM3Fr1hUDv7P433kd7 |


Journals & Collaborative Projects
Below you will find a sampling our members' work from previous collaborative projects. Click on images to view them larger. We hope this will inspire you to come and play with us! If you are interested in joining our group, please visit us at: http://groups.yahoo.com/group/Paper_Traders/
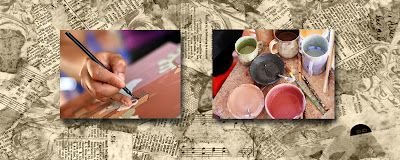
Tutorials & Techniques
Below are some of our favorite tricks for adding depth and dimension to your art. We hope you have fun giving these a try!

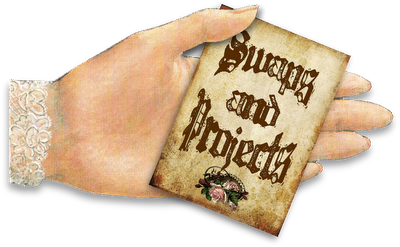
Current Group Swaps & Projects
Below is a list of current swaps and projects available to group members. If you are interested in joining our group and participating in these projects, please visit us at: http://groups.yahoo.com/group/Paper_Traders/.
For existing group members, you can sign up to participate in these projects here: Swaps & Current Projects.
We look forward to swapping with you. Happy Arting!

Member Gallery for Group Swaps
Below you will find a sampling our members' work from previous group swaps and projects. Click on images to view them larger. We hope this will inspire you to come and play with us! If you are interested in joining our group, please visit us at: http://groups.yahoo.com/group/Paper_Traders/.

Come play with us... Join today!
Paper Traders is a friendly online community of artists from around the world. We nurture and value creativity, embrace new ideas, products, and techniques yet also value tried and true methods of artistic expression. Our projects consist primarily of paper arts, mixed media collage, artist trading cards, altered art, assemblages, collaborative journals, mail art, and more.
We are interested in creative individuals of varied skill levels who wish to challenge themselves artistically and help build a supportive community. We are at our best when we can share our creative efforts as well as techniques, resources, feedback, and insights. We encourage conversation about art, the art process, and what it means to be an artist.
Paper Traders is hosted on Yahoo Groups at http://groups.yahoo.com/group/Paper_Traders/.
We hope you will consider joining us on an artistic journey!
In order to prevent spammers and to insure that all applicants are actual persons interested in creating art, a questionnaire will be sent to all potential members. When applying, please submit digital examples of your work or direct us to a website where we can view your art. The intent of the questionnaire is not to judge the merits of your art but to safeguard the integrity of our community.
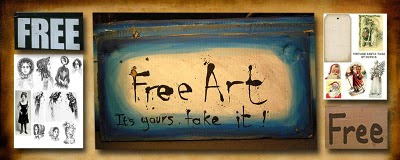
Free Images for Download
Below you will find images that are owned by our group members and offered for your personal use as well as images found in the public domain. Images may be freely used in your personal artwork but may not be used for commercial purposes of any kind without written permission of the owner. No images may be used to create collage sheets or image collections for resale.
To download, follow the link provided. In some cases, you may be able to just click on the image to enlarge it, then right-click and select "save image as". Content changes frequently and many images are available for a limited time. Please check back often for newly posted images to use in your art journey.
To download, follow the link provided. In some cases, you may be able to just click on the image to enlarge it, then right-click and select "save image as". Content changes frequently and many images are available for a limited time. Please check back often for newly posted images to use in your art journey.

Open Art Challenges !
We're changing things up here at Paper Traders. Instead of the monthly challenges of the past, we'll now be hosting special challenges that might feature a specific technique or product and will be rewarded with actual prizes sponsored by our group members.
Our new challenge for 2013 is a year long word prompt journaling project/challenge. Each specific challenge will be open for one month and all art bloggers can participate, whether you are a Paper Traders member or not. Each artist will comment with a link to their blog post that features the artwork for that particular challenge. For each challenge, a winner will be selected whose art best exemplifies the challenge. The winning artist will be featured here and get a "Trader Treasure" blog button to display on their own blog. They also will receive one chance for each entry for the end of the year prize drawing. Watch this page for more details and challenge announcements.
Our new challenge for 2013 is a year long word prompt journaling project/challenge. Each specific challenge will be open for one month and all art bloggers can participate, whether you are a Paper Traders member or not. Each artist will comment with a link to their blog post that features the artwork for that particular challenge. For each challenge, a winner will be selected whose art best exemplifies the challenge. The winning artist will be featured here and get a "Trader Treasure" blog button to display on their own blog. They also will receive one chance for each entry for the end of the year prize drawing. Watch this page for more details and challenge announcements.
Saturday, November 19, 2016
November Blog Freebie
It's time for another freebie courtesy of your Paper Traders Moderators. A great big THANK YOU to Connie Holso for preparing this terrific offering for your personal use. Please use the link BELOW the photo to download the high resolution file. Enjoy!
Monday, November 7, 2016
Wardrobe Tutorial
Wardrobe
Tutorial
By
Heather Maxwell

This tutorial goes with the free download from
Catherine Moore which can be found HERE.
Please note her design is for personal use only. The method used here only took about an hour,
exclusive of drying time. Try it! It’s kind of addicting. J
Supplies needed:
- Downloaded wardrobe design, patterned paper for the inside
- Glue
- 8.5x11 chipboard
- Scissors
- Hole punch, eyelets and applicator
- Ribbon
- Various images of choice for decorating the inside
- Heat gun
- Spray sealer

Once you have downloaded the wardrobe graphic, print
it out on 8.5x11 paper. I used sticker
paper to make it easier to adhere in the next step but you could print it on
good quality cardstock as well. I also
downloaded a design to use for the inside and printed that on sticker paper as
well.

Next apply the two graphic images to either side of
the chipboard. It doesn’t have to be
perfectly aligned since you will cut out the sections next. This part reveals the beauty of using sticker
paper. No drying time, no bubbles or wet
paper with sticker paper. If you don’t
have sticker paper, spray glue is the next best thing but plain glue, evenly
applied, works too. Once the glue is
dry, cut out the three sections.

If you are going to alter the surface of the wardrobe,
do that now. At the very least I always
smooth out and ink my edges. For this tutorial,
I stamped some faux texture to age the outsides. I also sprayed with distress ink, then dried
it with the heat gun. When I was satisfied
with the look, I sprayed it with clear sealer.
This is always a good idea if you are using images you printed yourself
(keeps them from fading).

Starting with the front section, mark three hole
positions down the left side, punch the holes.
With the insides together, use the holes you just punched as a template
to mark the left side of the middle section.
Use same technique to mark and punch holes on the right side of the
middle section inside and the left inside of the back section. You should end
up with 12 holes. Optional: insert and
crimp eyelets into the holes. This will
strengthen and add a nice finish (pretty side of eyelet is on the outside of
the section).


Cut six pieces of ribbon at about 6” per piece. Lay
sections in order, insides down, and thread the ribbons through, uniting two
sections. Before you tie the ribbon, put
a pencil or other long, skinny object between sections as a spacer, making sure
you have a gap between the sections you are uniting. Tie knots and trim ends.
 |
| dresses and shoes using Character Constructions stamps |
Now you can decorate the inside! Add shelves for shoes and accessories, birdcages,
pictures of loved ones… Don’t forget to leave room for the dresses! Dresses can
be attached with pop dots, glue, ribbon, tiny hangers or any other way you can
figure out. Play!
Heather
Subscribe to:
Posts (Atom)