Journals & Collaborative Projects

Below you will find a sampling our members' work from previous collaborative projects.  Click on images to view them larger. We hope this will inspire you to come and play with us! If you are interested in joining our group, please visit us at: http://groups.yahoo.com/group/Paper_Traders/

Tutorials & Techniques

Below are some of our favorite tricks for adding depth and dimension to your art.  We hope you have fun giving these a try!

Current Group Swaps & Projects

Below is a list of current swaps and projects available to group members. If you are interested in joining our group and participating in these projects, please visit us at: http://groups.yahoo.com/group/Paper_Traders/.  

For existing group members, you can sign up to participate  in these projects here: Swaps & Current Projects.  

We look forward to swapping with you.  Happy Arting!

Member Gallery for Group Swaps
 
Below you will find a sampling our members' work from previous group swaps and projects.  Click on images to view them larger. We hope this will inspire you to come and play with us! If you are interested in joining our group, please visit us at: http://groups.yahoo.com/group/Paper_Traders/.
 
Come play with us... Join today!

Paper Traders is a friendly online community of artists from around the world. We nurture and value creativity, embrace new ideas, products, and techniques yet also value tried and true methods of artistic expression. Our projects consist primarily of paper arts, mixed media collage, artist trading cards, altered art, assemblages, collaborative journals, mail art, and more.

We are interested in creative individuals of varied skill levels who wish to challenge themselves artistically and help build a supportive community. We are at our best when we can share our creative efforts as well as techniques, resources, feedback, and insights. We encourage conversation about art, the art process, and what it means to be an artist.

Paper Traders is hosted on Yahoo Groups at http://groups.yahoo.com/group/Paper_Traders/.
We hope you will consider joining us on an artistic journey!

In order to prevent spammers and to insure that all applicants are actual persons interested in creating art, a questionnaire will be sent to all potential members. When applying, please submit digital examples of your work or direct us to a website where we can view your art. The intent of the questionnaire is not to judge the merits of your art but to safeguard the integrity of our community.

Free Images for Download

Below you will find images that are owned by our group members and offered for your personal use as well as images found in the public domain. Images may be freely used in your personal artwork but may not be used for commercial purposes of any kind without written permission of the owner. No images may be used to create collage sheets or image collections for resale.

To download, follow the link provided. In some cases, you may be able to just click on the image to enlarge it, then right-click and select "save image as". Content changes frequently and many images are available for a limited time.  Please check back often for newly posted images to use in your art journey.

Open Art Challenges !

We're changing things up here at Paper Traders. Instead of the monthly challenges of the past, we'll now be hosting special challenges that might feature a specific technique or product and will be rewarded with actual prizes sponsored by our group members.

Our new challenge for 2013 is a year long word prompt journaling project/challenge. Each specific challenge will be open for one month and all art bloggers can participate, whether you are a Paper Traders member or not. Each artist will comment with a link to their blog post that features the artwork for that particular challenge. For each challenge, a winner will be selected whose art best exemplifies the challenge. The winning artist will be featured here and get a "Trader Treasure" blog button to display on their own blog. They also will receive one chance for each entry for the end of the year prize drawing. Watch this page for more details and challenge announcements.

Saturday, September 29, 2012

Seventh Anniversary Project Announced!!

This swap is for Paper Traders members only but we would love to have you join us.  Click on the purple Yahoo button on the right and start on your Paper Traders journey.


One-for-One 4" Altered Paint Brush
All Skill Levels
Sign Up Deadline: November 1st
Partners Announced: November 3rd
Mail Out Deadline: November 12th
Hosted by: Beckie Holso

Every year around this time, we have a special swap project to celebrate the anniversary of our Paper Traders group.  We encourage all group members to join in to make and trade a commemorative piece in honor of the event.

This year, we were inspired by The Altered Brush Project a la Donna Downey Studios who took inspiration from a single altered brush by Mindy Lacefield and ran with it, creating quite a sensation...

Mindy's original altered brush: http://www.flickr.com/photos/timssally/5930100529/in/photostream

Altered Brush Pinboard: http://pinterest.com/donnadowney/the-altered-brush-project/

Donna Downey Studios Altered Brush Project: http://donnadowney.typepad.com/simply_me/the-altered-brush-project/

As you can see, the ideas for these brushes are just endless!  We hope you are feeling inspired to try this fun project with us.  We will be using a 4" paint brush like the ones shown in the links provided about.  You may decorate in any style you want - there is no particular theme but, in honor of our 7th anniversary, if Lucky Number 7 inspires you in some way then just go with it!

Please sign up in the Swaps Database by November 1st.

Partners will be announced on November 3rd and you will have an additional week to put the final touch on your brush to get it mailed out by November 12th.

Don't forget to share a photo of your brush in the project album.

Happy Anniversary, everyone!

Friday, September 28, 2012

Vintage Photo Freebie

The moderators are so pleased to share this wonderful vintage cabinet card image  for your personal use.  A great big THANK YOU goes to Connie Holso for sharing this with us.  Please click the link found below the preview to access the full size file.  Enjoy!


Friday, September 21, 2012

Vintage Photos Freebie

The moderators are so pleased to share this wonderful collage image sheet for your personal use.  A great big THANK YOU goes to Connie Holso for putting this together.  Please click the link found below the preview to access the full size file.  Enjoy!

Click HERE for Hi-Res Download

Friday, September 7, 2012

Rust Your Own Tins Tutorial


The Paper Traders Art Group Mods were discussing various ways to rust metal/tin to use in art projects and we came across various tutorials in the blogosphere on how to do this, so we decided to give several of them a try and share the results with you. 


These tutorials came from the following:


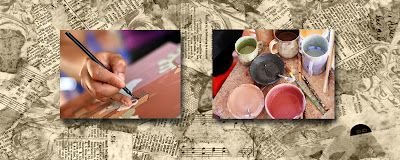
Gather your materials:
various metal tins (I used an Altoid tin, a mint tin from Starbucks,
and a purchased tin from Michaels)
bleach
vinegar
hydrogen peroxide (HP)
sea salt or other non-iodized salt
newspapers or other protective cover for your table
glass or plastic bowls
plastic gloves
protective face mask for breathing
goggles

Roughly sand your tins with a very coarse sandpaper.  I used a #50 grade.  The more paint and sealant you remove, the better the results.

You can also remove paint with oven cleaner and by burning the tin.
 Here are a couple of links with tips on this:


You must do this in a well-ventilated, preferably an outside location; and wear gloves, a mask, and goggles.  Keep pets and children away. Please take every precaution.


Recipe 1: HP & Salt. 

Fill a bowl with enough HP to cover the tin.

Dip tin in, pull out wet, and lay on newspaper.


Sprinkle with salt and let sit.


As you can see, the rust is starting to form around the salt rather quickly.  However, after letting it sit for several minutes (5-7), when I wiped the salt off, the rust wiped off as well and there was no noticeable change on the tin.  I repeated the steps several times and still no results.  This may work over several hours but in the time I allotted (1 hour), I did not see any permanent changes.  


I decided to research this a little more and came across a
 Metal Artists site that had a varied take on
this recipe and it produced much better results.

Basically, after sanding your tin, you need to
 “pickle” your tin in vinegar for a few minutes. 
The Vinegar will corrode the metal lightly and so will rust better.
I set my tins in the vinegar for approximately 3 mins. on each side.
I used a Sea Salt and HP solution of 2 oz. HP
 with 1 tsp. of sea salt in a spray bottle.
  Let the salt dissolve in the HP before spaying.


As you can see it started to bubble immediately.  I sprayed
The tin about every 2- 3 mins, changing sides as I sprayed.

Another tin after about 20 mins:


I needed to run a few errands ( yes, life gets in the way of art)
and so decided I would just set the tins in the solution
on a glass plate. When I came home, 2 hours later,
I was very happy with the results.

Recipe 2: 2 parts Bleach & 1 part Vinegar

Reminder: You must do this in a well ventilated, preferably outside location and wear gloves and mask and goggles.  Keep pets and children away.  (I did this outside on my porch with a fan blowing and the fumes were still very bad for this particular recipe.)

Within 5-10 seconds rust was already forming:


This was after about 5 mins:


This was after about 10 mins:


This was after about 20 mins.  I poured some of the mixture
 into a shallow bowl and just let the bottom of the tin 
soak in the mixture for about another 15 mins.
 It rusted less because of the paint and 
sealant remaining on the outside of the tin.  
This is why you want to sand the tin well before you start.
As you can see you get a pretty deep rust rather quickly with this recipe.


I then added the round purchased tin from Michaels.  I had to sand this quite a bit because of the sealant on it.

After 45 mins:


After it completely dried it looked much better:


Recipe 3: 1 cup HP, 1/8 cup of Vinegar, 1 Tbsp. Salt

This is the recipe I prefer as the fumes are much less noxious.  It takes a good 45 mins to get results but I think it is the safer way to go.

It will start to bubble pretty quickly:


After 15 minutes, lots of bubbles:


Results after 45 mins, inside of the Starbucks mint tin – Nice rust, not as orange or as corroded looking as Recipe #1, but a good color:

Outside of tin.

An Altoid tin with the same recipe.


When you pull your tins out of the solutions, DO NOT dry them off.  Let them air dry naturally or you will wipe off some of the rust.  I set mine on paper towels and I got some pretty cool rusty towels that I am sure I can use later for collage.  When completely dry, you can seal your tins with varnish, if you prefer.

 We hope you enjoyed our tutorial on rust.  Please remember to be safe if you try any of these methods.  And we invite you to share comments about your own experiences with various rusting techniques.  Have fun!

~Cathy Calamas

Tuesday, September 4, 2012

Gallery: Paper Mache Hearts

Amanda E

Beckie H

Cathy C

Debra C

Debra C

Lorna S

Misti S

Misti S