


I have a bit of a "thing" for containers of all sorts and particularly for tins. I've been known to buy something for the vessel it's in rather than the product itself. I use these containers to create assemblages. I find the layering of elements and images both fascinating and calming. Here's my method:
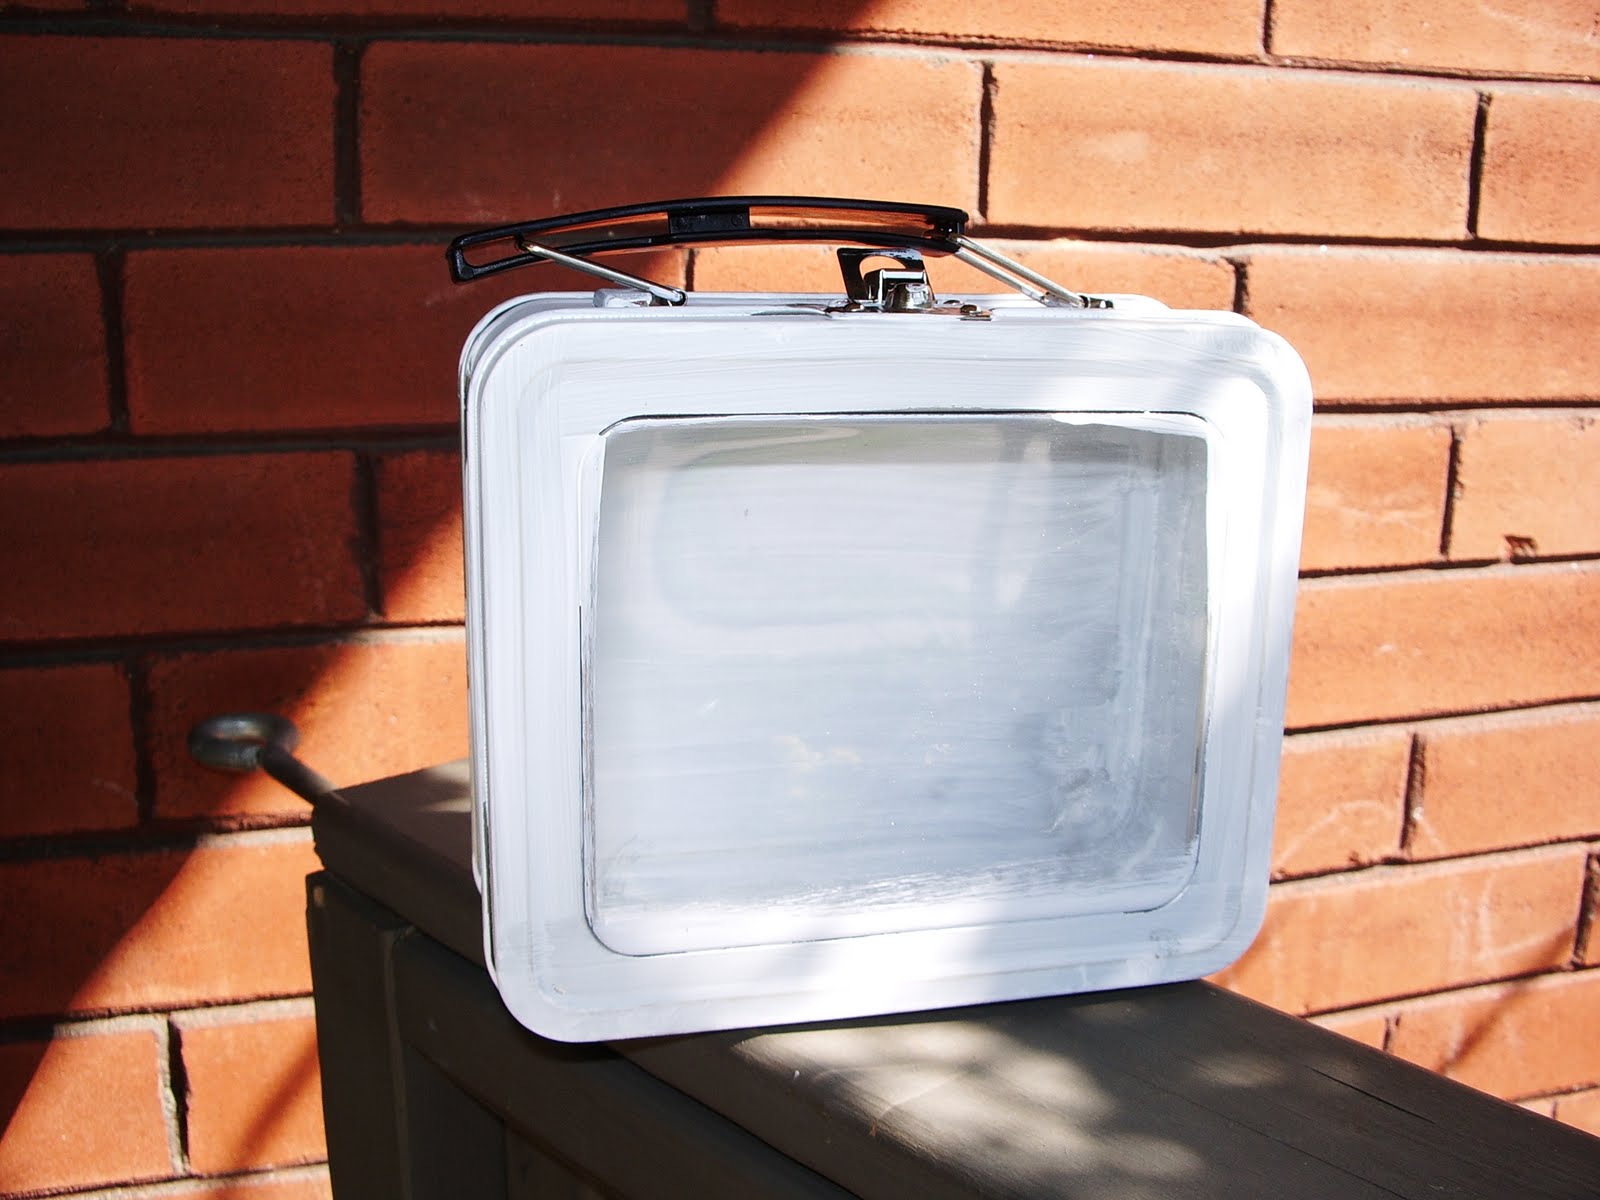
Scope out your tin or container. Believe me, once you get hooked, your cupboards will be filled with them. The one I chose has a window which I like very much. I often choose the container first then give myself some time to match it with an idea. In this case, the tin with the handle reminded me of the lunch boxes that we used to bring to school. This was a perfect fit with the French Kissed school- related images I wanted to use. Sand the tin (you don't need to do the inside of the front if you are going to keep it closed when it is finished). Wipe off the "dust" and coat with gesso. Allow to dry.
Choose colours of acrylic paint for both the outside of the tin and the inside. I like using Claudine Hellmuth's paint in particular as it has excellent coverage and a thick, buttery texture to it. I tend to favour a darker colour for the outside and a lighter for the inside but it is entirely up to you.
Now it's time to do a little gathering. Choose your focal image or images and gather related papers and embellishments. You won't use them all but you'll have lots of choices when you are creating. I find that hunting for these items while I'm creating is distracting.
 Choose paper that will form your background inside the tin. In my case, it is a piece of scrapbook paper with a school theme. I used beeswax to build layers and add texture but you can use any technique that you wish. I then added the image of the school children and a quotation that I found.
I never want all of the background elements to be flat on the background so I add foam squares to the back. One set of squares for the first layer, two sets for the second and so on.

 Embellish as you please. I used a key to highlight the word "school" and had the teacher holding a clock. I also added a little wooden window to bring to mind a one-room schoolhouse.
 I like to have the background raised from the tin to give depth so I added foam tape to the back before I affixed it to the base.
I thought I needed a little something on the ground so I used my shredder to shred some vintage papers. These I glued to the bottom.
 Once I was satisfied with the inside of the container, I closed it and began working on the outside. I found that the film on the "window" added a murky look that I didn't like so I removed it with an exacto knife. I then added the image of the little boy and additional embellishments. As a finishing touch, I outlined the tin and the window with gold ink just to make it pop.
8 comments:
What a beautiful tin...thank you for the tutorial! You inspired me to go alter one of my own!
thats a cool tin .....x
Thank you both for your sweet comments. I find it so soothing to layer elements in tins. Hmmm....what does that mean? Hugs, Heather
Very sweet tin, Heather. And a great tute. What did you use for the nesting graffiti strips...newspaper or book pages? xoxo
AHA! A tinoholic...I've heard there's groups for this...LOL. Lovely tin, Heather! I'm inspired too! Thanks for sharing...Smiles, Lorna
Perfectly wonderful. Great, great images. Can't wait to try my hand at this, but I don't need another addiction!! :))
Are you folks telling me that I have an addiction? Me? Tee, hee....yes, I admit it. Aimeslee, I used my shredder to shred some vintage book pages!! Love all the feedback and thank you for it.
Great tutorial, Heather. I am in L-O-V-E with your final result... just awesome!
Post a Comment