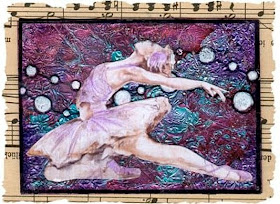
I do love happy accidents. This tutorial was originally inspired by Dani Rogall aka Stampingwitch. You can watch the video here:
Step 1 and 2 are from the video.
Step 1:
Take some aluminum foil, crumble it and glue it on some cardstock.
Step 2:
Take a applicator and put some alcohol inks on it and colour the transparent sheet. The colours I have used are Denim, Eggplant and Red Pepper. Then put some blending solution on the applicator and go over it again.
Put some Diamond Glaze on the cardstock with the aluminum foil on top.
This is how it looks when you put the transparent sheet onto the aluminum foiled cardstock.
This is when I came back after one hour. It already started to separate the colours.
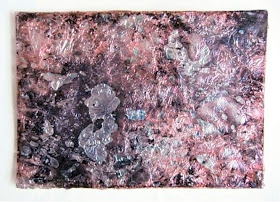
And after a few hours more it already looked liked this. I really love the effect and every time you try this it will be completely different. Before finishing off your card or ATC you will have to wait a day before it is thoroughly dry. Oh boy, waiting is not my strongest quality LOL.
The first time I did this I was completely surprised. I made an ATC for a personal swap and we had to work in purple, so I made a perfect purple background, and did all the steps above.
The next day I went to my art room to check up and oh my gosh, all the colours had changed. My first reaction was to start all over because it wasn’t that purple anymore but when I looked at the ATC again I really saw what happened I was very excited because I really liked the effect.
So now I tried if I could do it again and make a tutorial out of it and YES!! It worked out, so now my happy accident is no accident anymore is now a technique HAHAHA!
Here the ATC I was talking about, it was as purple as the right upper corner.
 Have fun playing around.
 Have fun playing around.
Warm regards Hermine Koster augustus 2009 ©


Thank you for the tutorial. It is awesome and an awesome technique. I am going to try it, but I am wondering how and when you stamped your image on the background.
ReplyDeleteSharron,
ReplyDeleteThanks so much for stopping by! That tutorial was offered by one of our members, Hermine Koster. I've forwarded your message to her but you can contact her through her blog here: http://herminesplace.wordpress.com/
I'm pretty sure the image is layered over the top of the background and not stamped directly onto it but I know Hermine can give you more details herself.
Happy Arting!!